Rampwin | Chat Commerce
  • Welcome to Rampwin
  • 🚀 STARTING WITH RAMPWIN
    • Login to Rampwin
  • Connecting to a Channel
  • Add Team Members
  • Reply to Messages
  • ⚙️ Setting
    • Overview
  • My Account
  • General
  • Chat Settings
  • Blacklisting Settings
  • Live Translation Settings
  • Chat Assignment Settings
  • Chat Queue Setting
  • Reply on Conversation Status Change
  • Working Hours
  • Roles & Permissions
  • Department
  • Team
  • Quick Reply
  • Automation Workflows
  • Trigger
  • Trigger Conditions
  • Actions/Steps
  • Custom Fields
  • 🧰RAMPWIN MODULES
    • Dashboard
  • Chat
  • Search Conversation
  • Select and Download Conversations
  • Send Message
  • Contact Info
  • Chat More Options
  • Channels Overview
  • Contacts
  • Contact List
  • Custom Fields
  • Follow Ups
  • Campaigns
  • Basic Campaigns
  • Drip Campaigns
  • Automation
  • Integrations
  • Rest API
  • Facebook Leads
  • File Manager
  • Message History
  • Marketplace App
    • Shopify Marketplace Setup
  • WooCommerce Marketplace Setup
  • Setup WooCoomerce Automations
  • 🌎 Rampwin Messaging Channels
    • Connecting to a Channel
  • Channels Overview
  • WhatsApp Integration
  • Cloud API
  • Message Templates
  • Button/Options/Product Messages
  • WhatsApp Message Templates
  • Facebook Integration
  • Viber Integration
  • Store Settings
  • Message Templates
  • Page Post Comments
  • Instagram Integration
  • 🛍️STORE SETTINGS
    • WhatsApp
    • Catalog Settings
    • Products
    • Payment Settings
    • Facebook
    • Instagram
  • 💡MORE How-TO's
    • Create a Facebook Page
    • Assign Facebook Page Admin Role
    • Switch Instagram Personal to Business
    • Allow Access to Messages in Instagram
    • How to Delete WhatsApp Account
    • Setup Zoho CRM Extension
  • 💳PAYMENT METHOD AND SUBSCRIPTION
    • Add Payment Method
    • Manage Subscription Plans
  • API Documentation
Powered by GitBook
On this page

WooCommerce Marketplace Setup

With the WooCommerce Marketplace App you can send order reminders, cart abandoned notifications, order fulfillment notification & many more things.

PreviousShopify Marketplace SetupNextSetup WooCoomerce Automations

Last updated 2 years ago

To setup your WooCommerce store in Rampwin first you need to create a API Key in your WooCommerce Store steps below to Create API key.

To create an API key in WooCommerce, please follow the steps below:

  1. Log in to your WooCommerce website with your administrator account.

  2. Navigate to the "WooCommerce" menu in the WordPress dashboard and click on the "Settings" option.

  3. In the "Settings" screen, select the "Advanced" tab and then click on the "REST API" option.

  4. On the REST API screen, click on the "Add Key" button.

  5. In the "Add Key" screen, enter a description for your API key in the "Description" field. This description will help you identify the key later.

  6. Under the "Permissions" section, select the level of access that you want to give to this key. You can choose to give read-only access or full access.

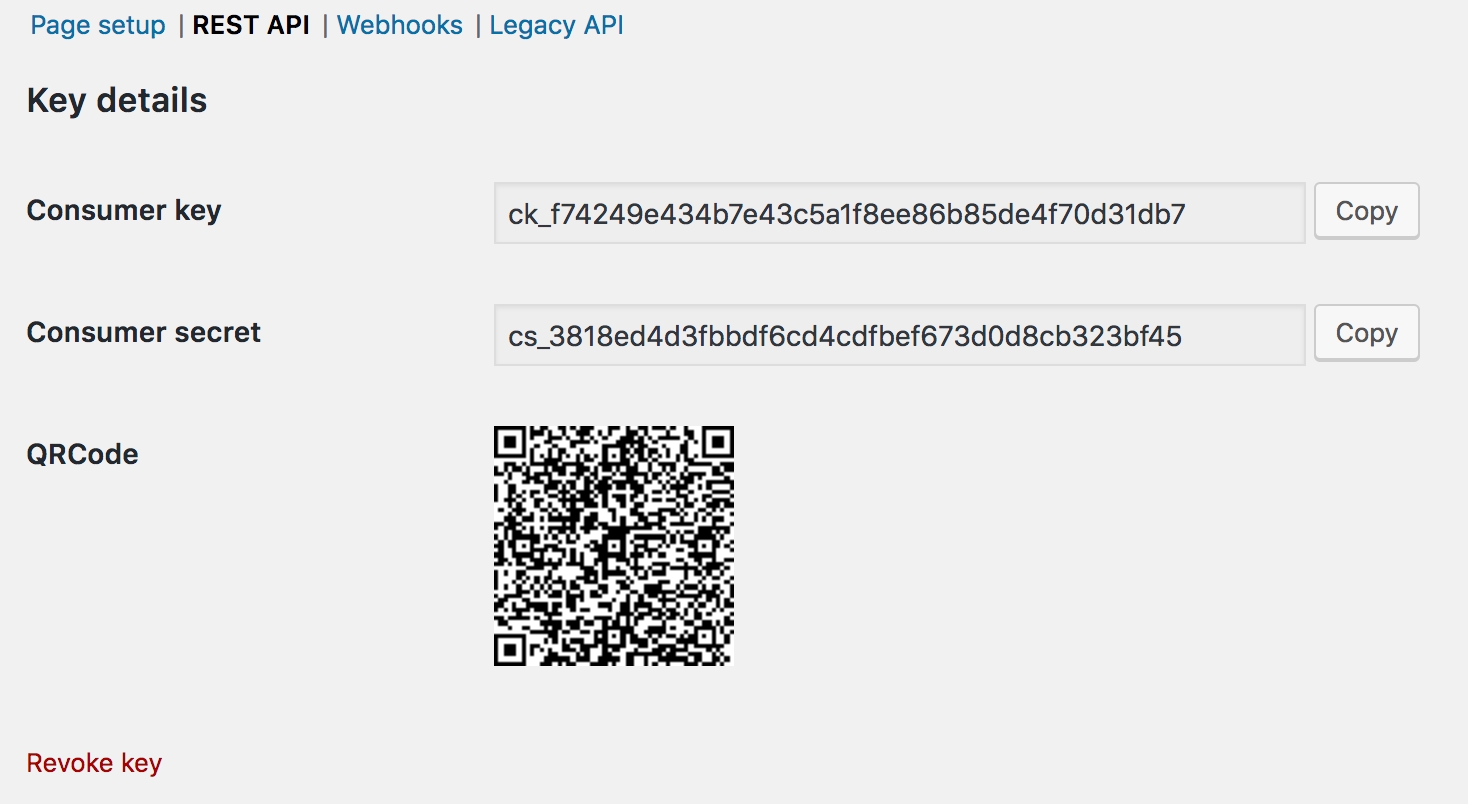
  7. Click on the "Generate API Key" button. This will generate a new API key for you.

  8. Copy the Consumer Key and Consumer Secret and save them in a safe place. You will need these keys to add marketplace app in Rampwin.

Steps to add WooCommerce API Key into Rampwin

  • Click on Integration from left hand side menu.

  • Select Woocommerce from Marketplace Apps.

  • Fill consumer key, consumer secret & Store URL in the Popup & Save.

When App configured you can Sync you Existing Contacts one time with Sync Contact Buttons.

When Your app is configured you can setup automation on Webhook Topics like below.

API Key
How to Add API Key
Generate API Key
Configure WooCommerce
Configured App