> For the complete documentation index, see [llms.txt](https://docs.rampwin.com/llms.txt). Markdown versions of documentation pages are available by appending `.md` to page URLs; this page is available as [Markdown](https://docs.rampwin.com/english/contacts.md).
# Contacts
Or, if you want to add another filter in the same group, click the Plus buttoninside the filter group.The filter options available are,Otherwise, first, select the country code, then add tags (if required), and add the contacts' file from your local system. Using the Contact module of Rampwin, you can add, edit, remove, shortlist, blacklist, and perform more actions to your contacts to manage them effectively and per requirements. The module provides you with a lot of options that make it easier to use contacts for different reasons.
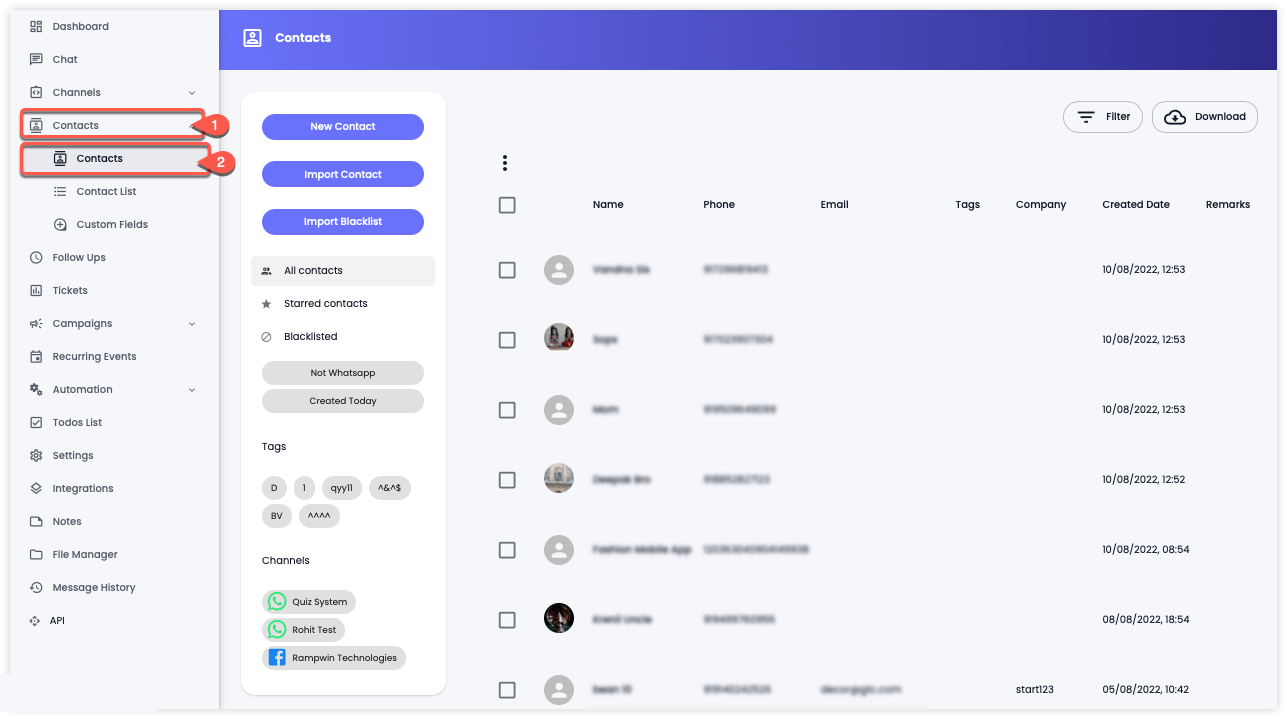
To access the Contacts from your Dashboard, go to the left sidebar → **Contacts** → **Contacts**.
### Add New Contact
To add a new contact, click **New Contact**.
Then, in the New Contact pop-up, enter the details as needed. And once done, click **Add** to save the contact.
### Import Contacts
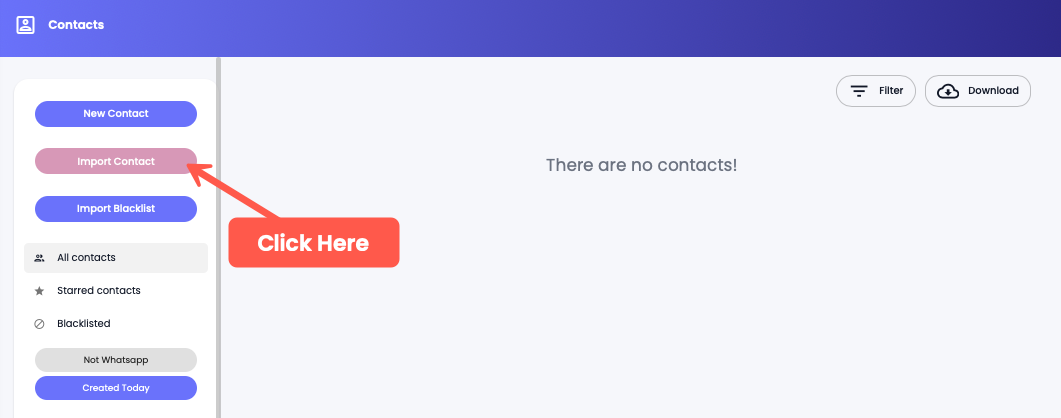
To add contacts by uploading a file, click **Import Contact.**
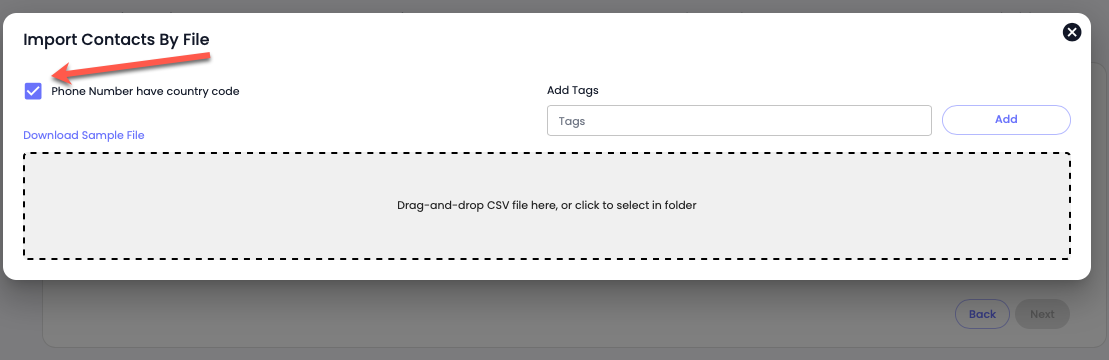
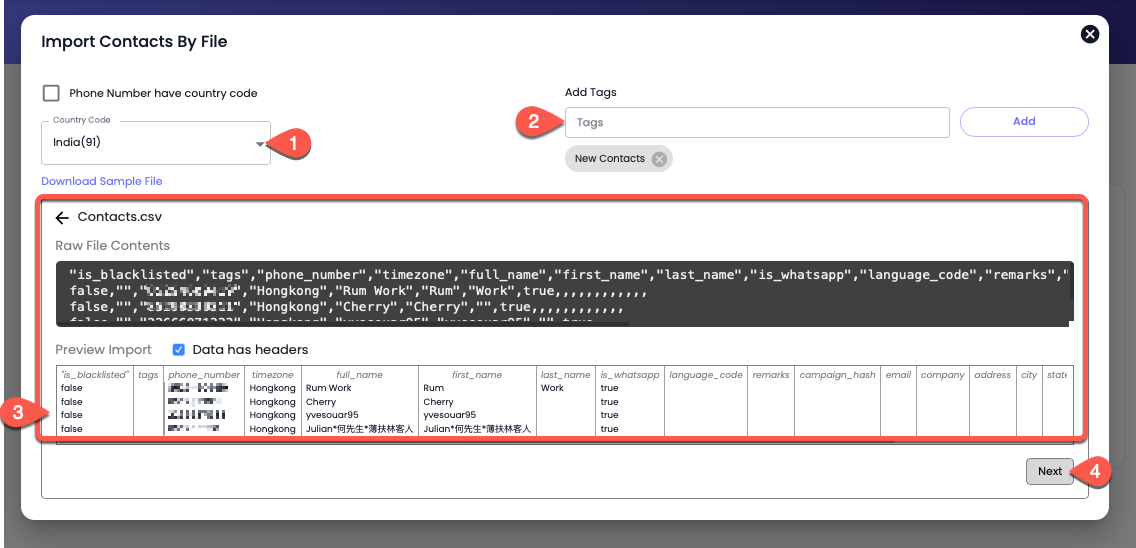
A modal will appear with the options to choose the Country Code, Add Tags, and Select the file. If the file already has a country code for the contacts, you can tick the **Phone Number have country code** checkbox.
Otherwise, first, select the country code, then add tags (if required), and add the contacts' file from your local system.
As you do that, you'll see your contact numbers and other details in the modal. Once you're satisfied, click **Next**.
On the next screen, ensure that all the information is assigned to the right column. If everything is correct, click **Next**.
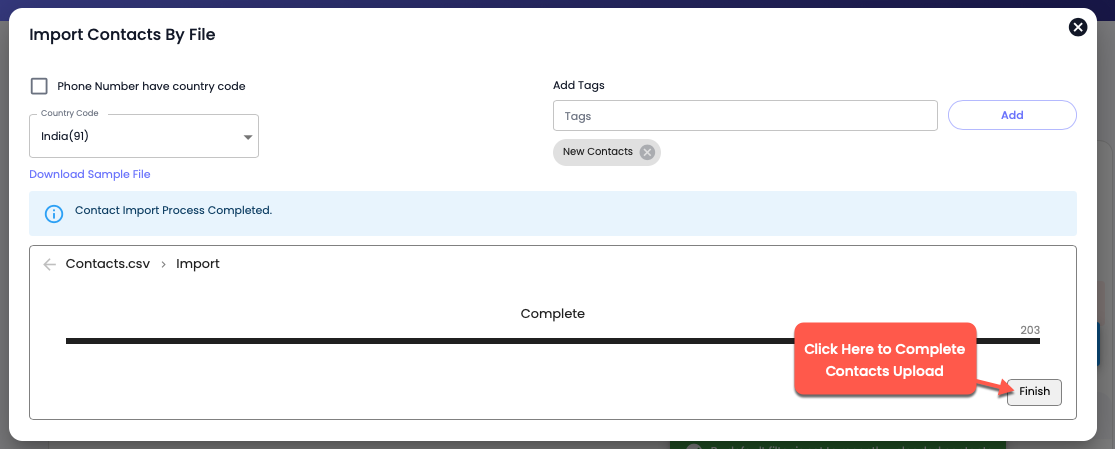
It'll take a few moments to upload the contacts, and once the process is completed, you can click **Finish**.
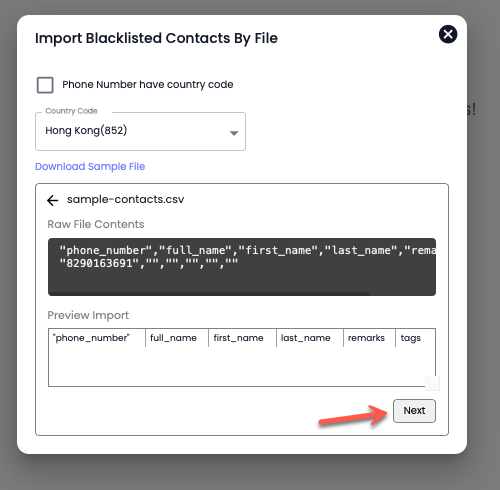
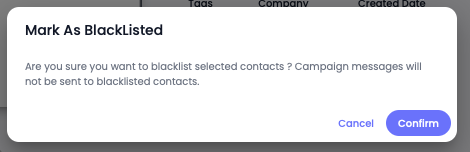
#### Upload Blacklisted Contacts
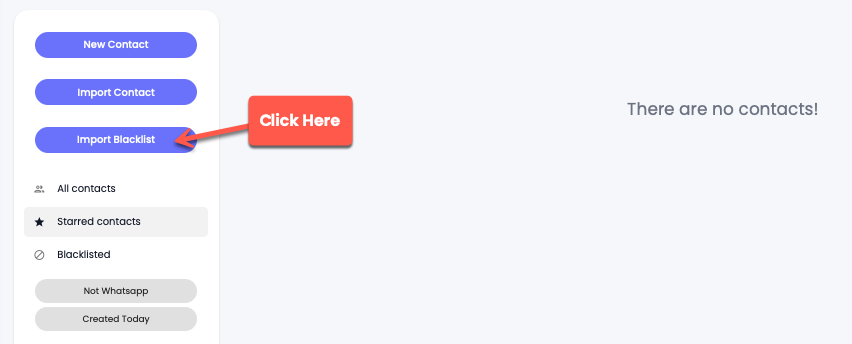
Click **Import Blacklist**.
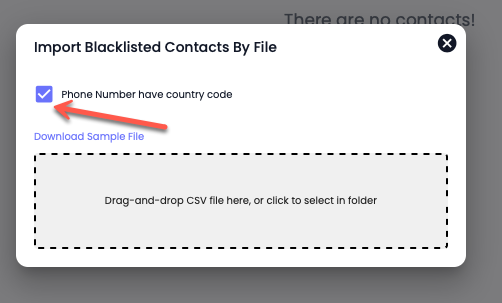
Then, tick the **Phone Number have country code** checkbox; if the file already has a country code for the contacts.
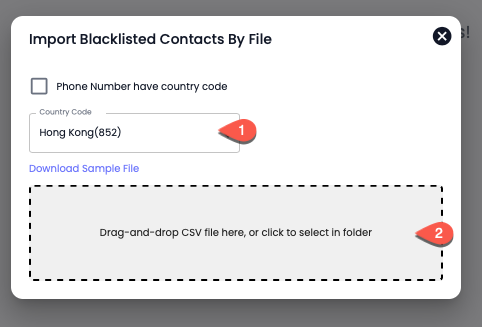
Otherwise, first, select the country code and then select the contacts' file from your local system.
Click **Next**.
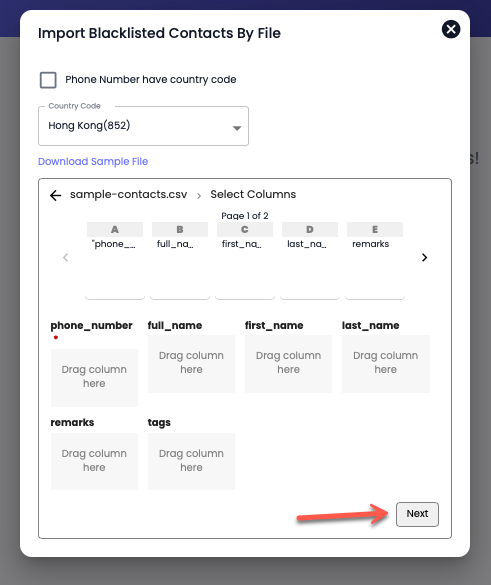
On the next screen, ensure that all the information is assigned to the right column. If everything is correct, click Next.
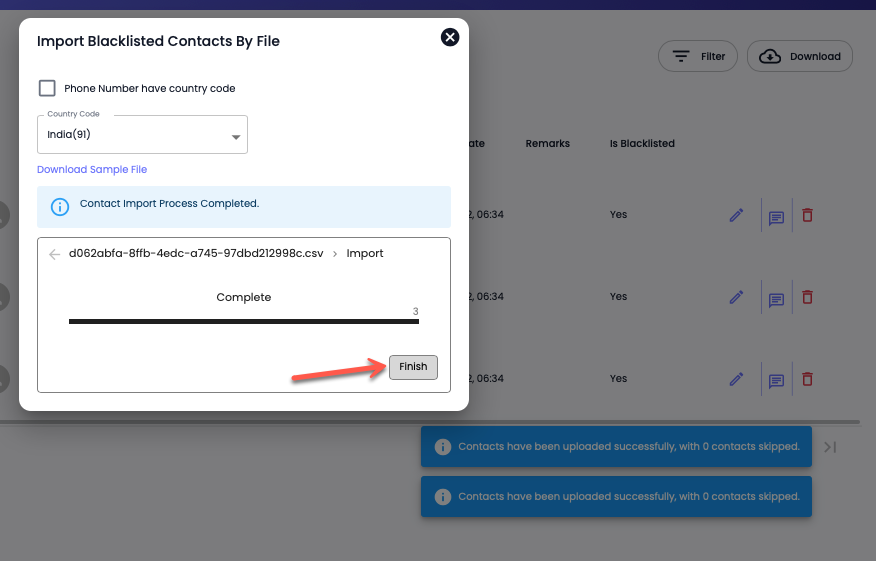
Then, click Finish to complete the import.
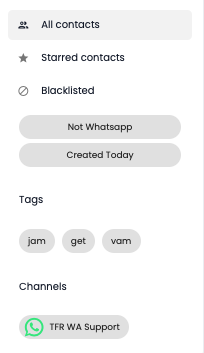
### Basic Filters
The Basic Filter options let you quickly sort contacts.
By default, you see All Contacts; however, using the available options, you can filter contacts and,
* View contacts that are Pinned, using the **Starred contacts** option**.**
* View Contacts that are Blocked, using the **Blacklisted** option.
* **Not WhatsApp** - View contacts that aren't in WhatsApp Channels.
* **Created Today** - View Contact(s) that's created on the current date.
* **Tags** - Filter contacts based on Tags.
* **Channels** - Filter contacts based on Channels.
### Advanced Filters
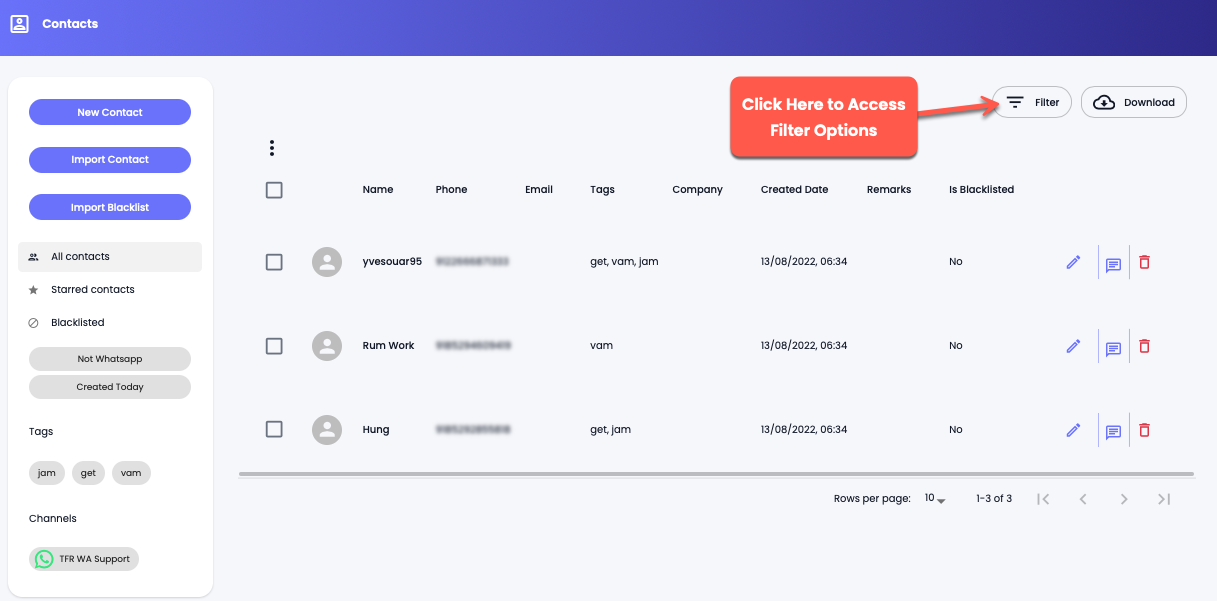
Click the **Filter** button to access the filter options.
The filter options available are,
* **Columns**
* **Operator**
* **Value**
First, you need to select the column on the basis you want to filter the contacts. There are 10 options from which you can select the column.
After selecting the column, select the Operator that will verify the Value in the column. There are 9 operator types from which you can select one.
* IS - The Column and Value should exactly match to apply the filter.
* STARTSWITH - The value in the Column should start with the value in the Value field to run the filter.
* CONTAINS - If the value in the Column includes the value in the Value field, the filter will run.
* IS NOT - To apply the filter, the Column field should not match with the Value field.
* DOES NOT CONTAIN - To apply the filter, the Column field doesn't include the instances of the Value field.
* IN - The Contact(s) **In** the particular Tag(s).
* NOT IN - The Contact(s) **Not In** a particular Tag(s)
* MATCHES - The Channel Name Should Match the Value.
* BETWEEN - The Contact(s) Created or Updated **Between** the Date Range.
Once selected the operator, enter the value or select the option available in the Value field. The value field based on Column provides you with different options that are,
* Tag list for the Tag column.
* User / Group for the Contact Type column.
* Channel names for the Channel Name column.
* Date Range (Today, Yesterday, This Week, This Month, and Custom) for Created At and Updated At column.
After adding the values in the fields, click **Submit**. And this will show the filtered contacts.
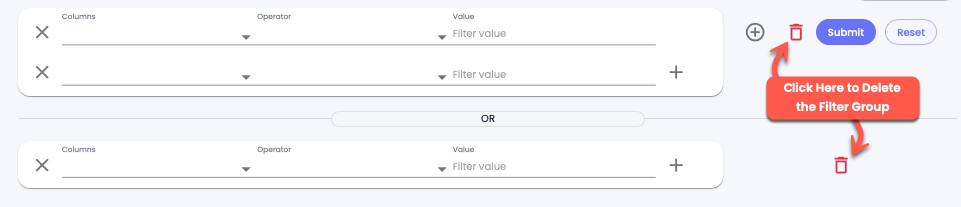
If you want to add more filter groups, you can click the Plus button iconnext to the delete button.
Or, if you want to add another filter in the same group, click the Plus buttoninside the filter group.
To delete a Filter Group, you can click the Delete buttonassociated with that group.
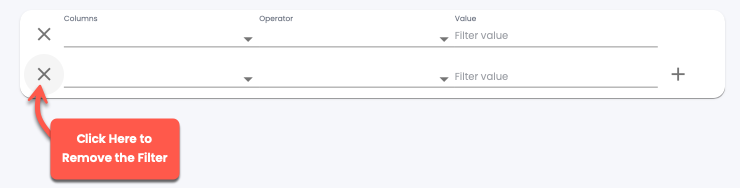
And to delete a filter, you can simply click the Cross buttonassociated with the particular filter rule.
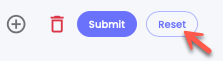
And to reset all the filters, simply click **Reset**.
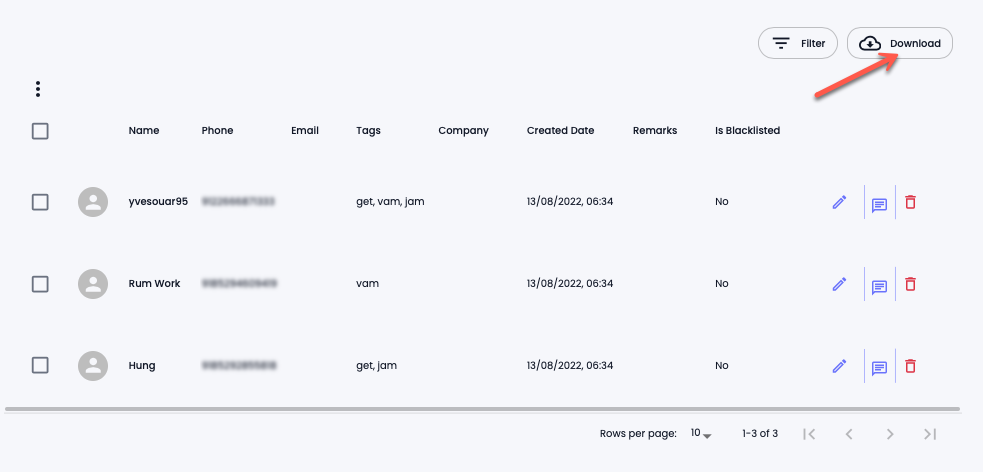
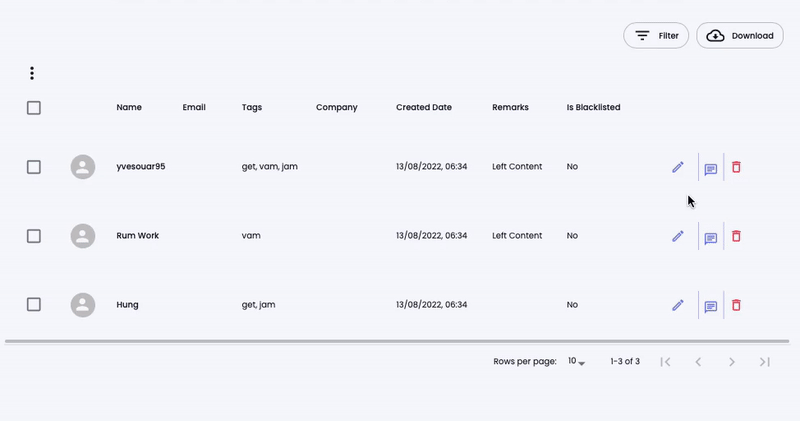
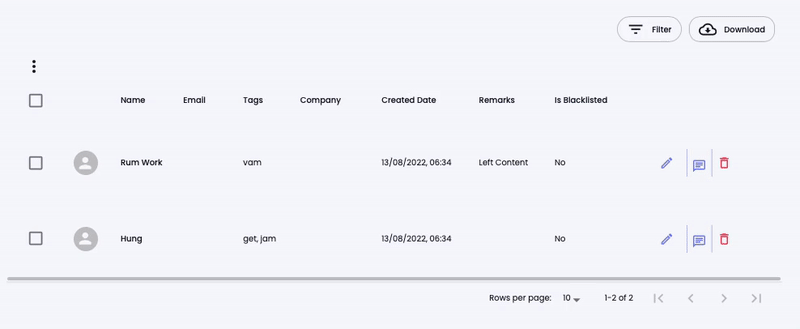
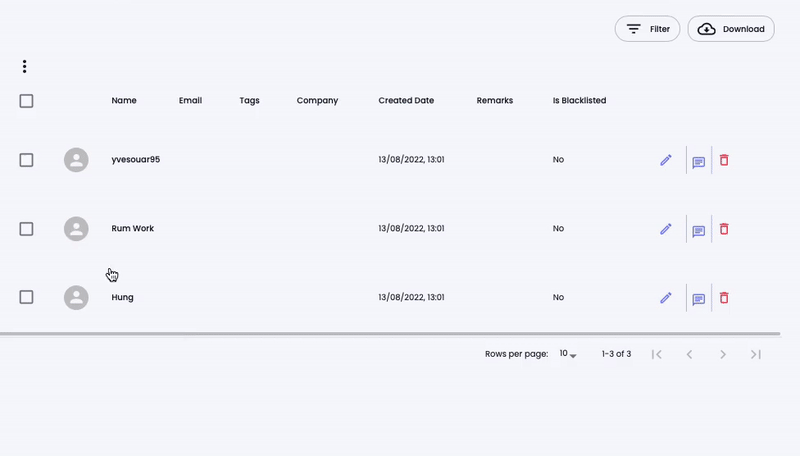
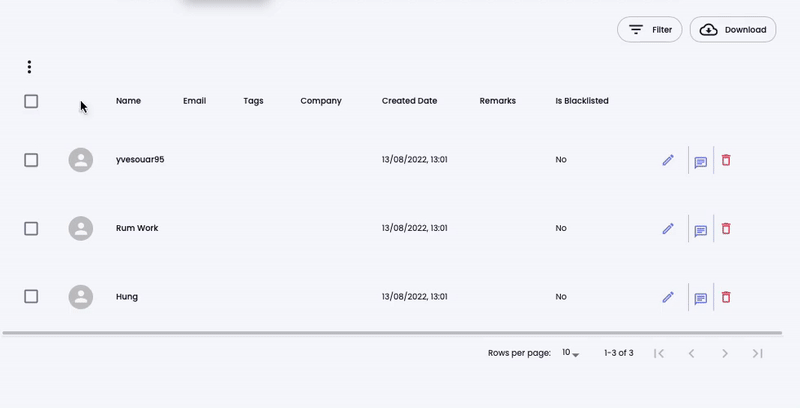
### Download Contacts
To download contacts, click the **Download** button.
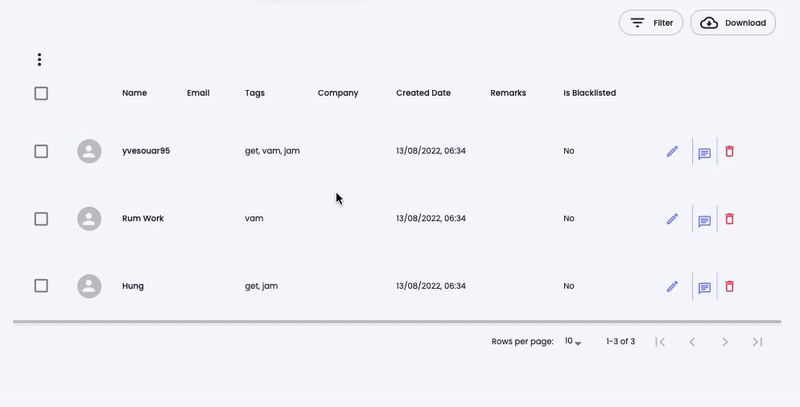
### Hide/Show Columns
Click the Menu buttonthen check/uncheck which column you want to view and which doesn't.
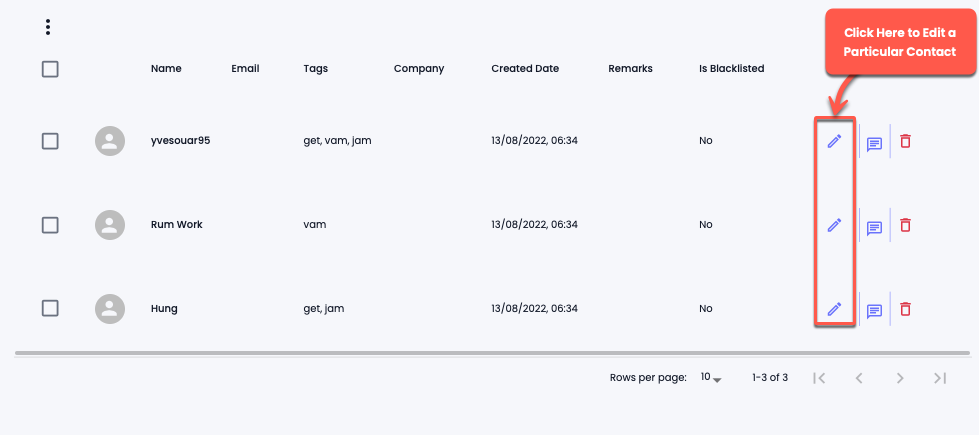
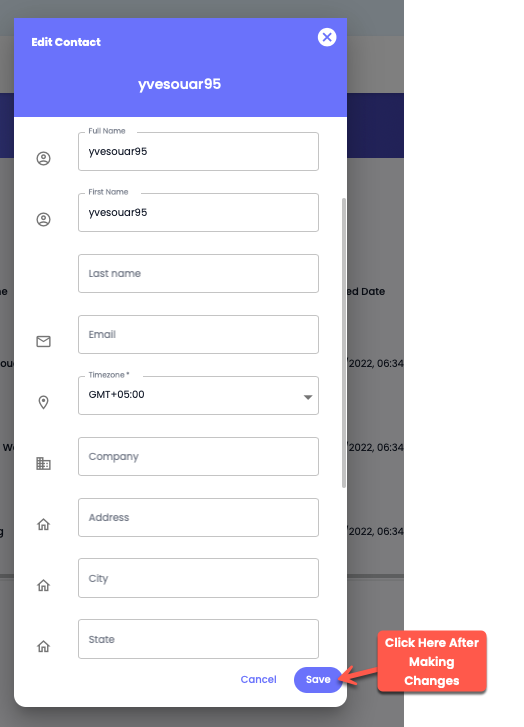
### Edit a Contact
Click the Edit Button Icon
Make changes to the details, and once done, click **Save**.
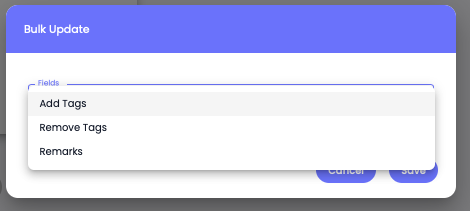
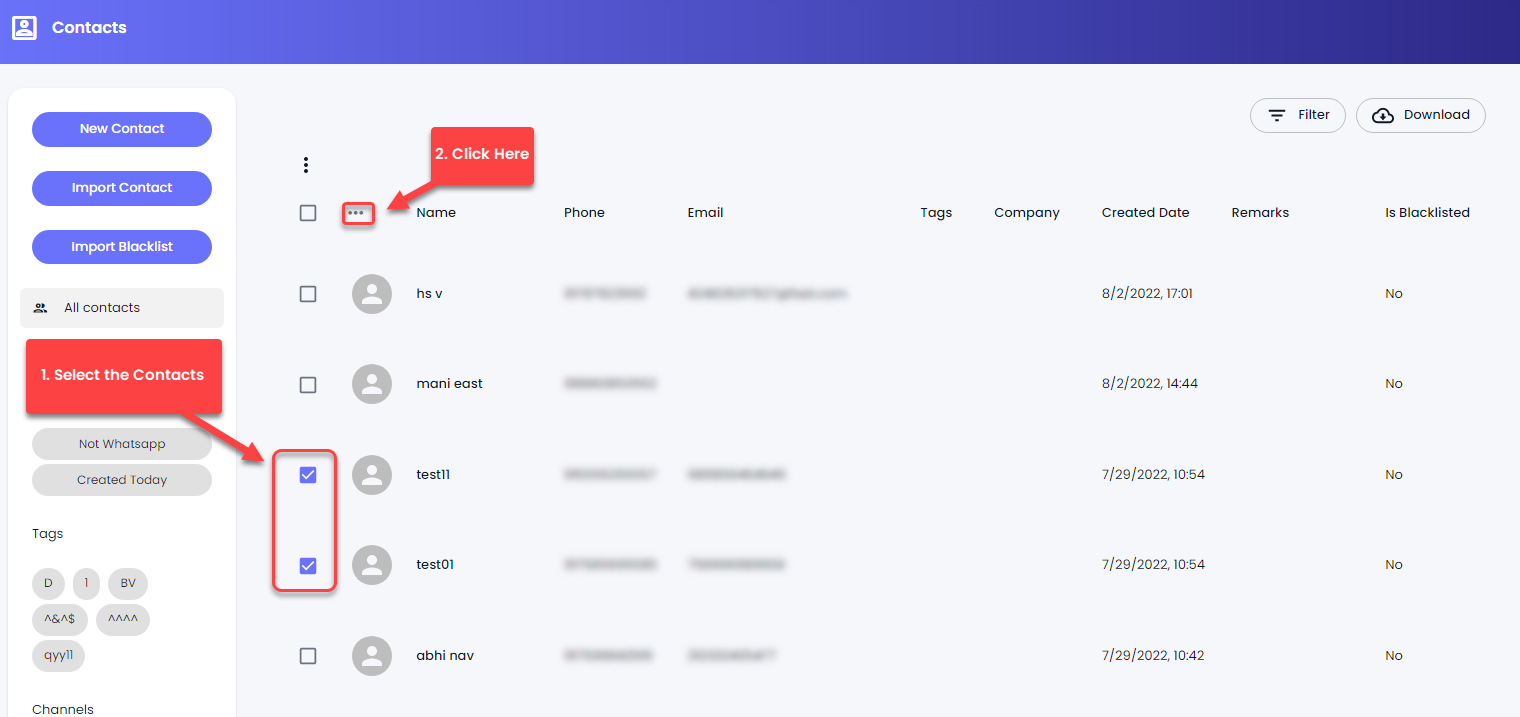
### Bulk Update
First, select the contacts to which you want to make changes.
Then click the More Options buttonnext to Bulk Select, and then select **Bulk Update**.
A popup will come with the options to
* Add Tags
* Remove Tags
* Remarks
Select one from the above and make changes as required.
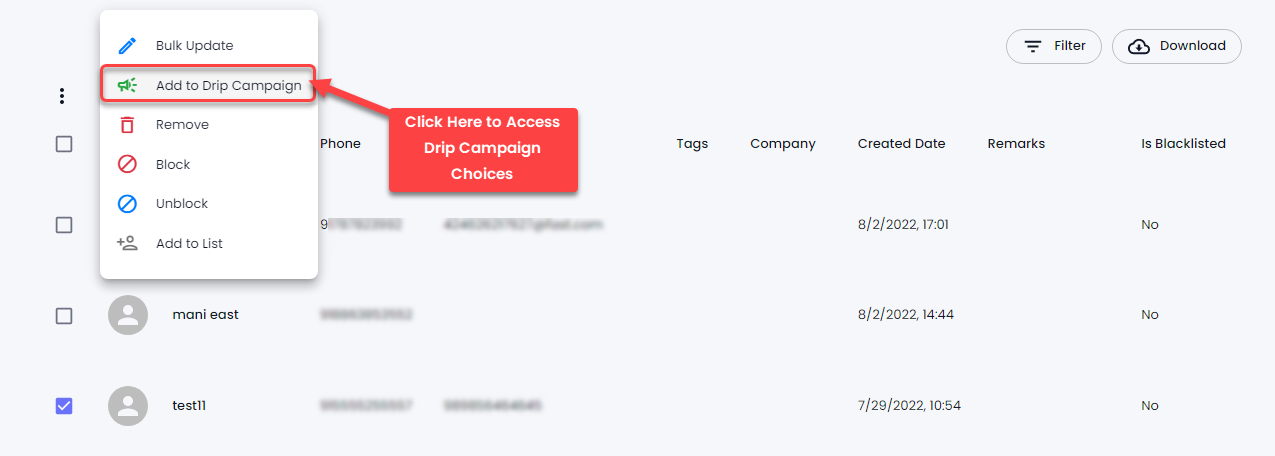
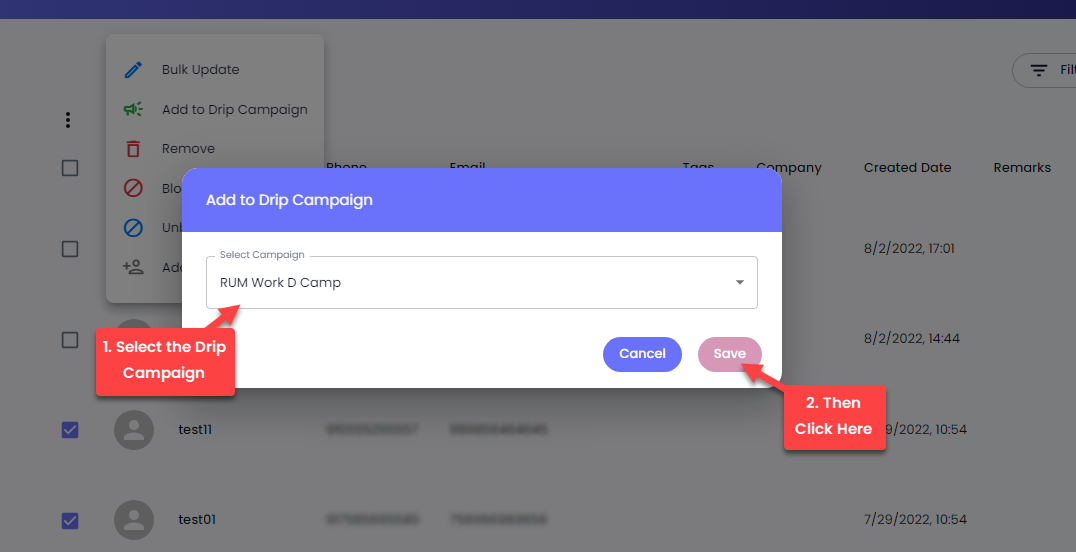
### Add to Drip Campaign
Select the contacts you want to add to the Drip Campaign. Once selected, click theMenu button next to bulk select, and then click **Add to Drip Campaign**.
Select the campaign to which you want to add the contacts, and then click **Save**.
That's it; you've added the contacts to a Drip Campaign.
### Remove a Contact
Click the Trash Button iconassociated with contact to delete it.
Then, click the **Confirm** button to finalise deleting.
### Bulk Remove
First, select the contacts you want to delete. Then click on the More options buttonand then click **Remove**.
In the Bulk Delete popup, click the **Confirm** button.
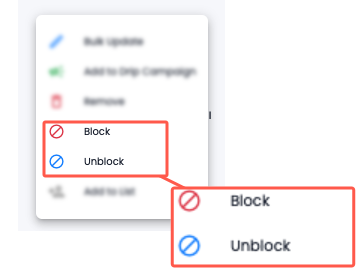
### Block/Unlock a Contact(s)
To Block or Unblock a contact(s), first, select the contacts, then click theMore Options button.
From the available options, either select
* **Block**
* Or **Unblock**.
Then click the **Confirm** button to finish the action.
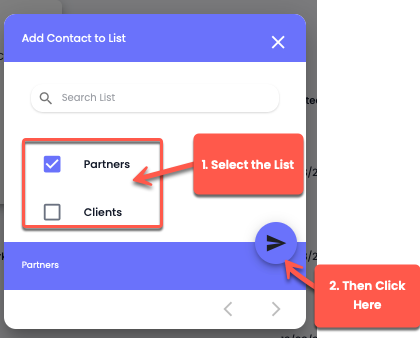
### Add to List
To add contacts to a contacts group, first, select the contacts. Then, click theMore Options button, and then click **Add to List**.
From the available lists, select the ones to which you want to add the contacts, and then click the submit button.
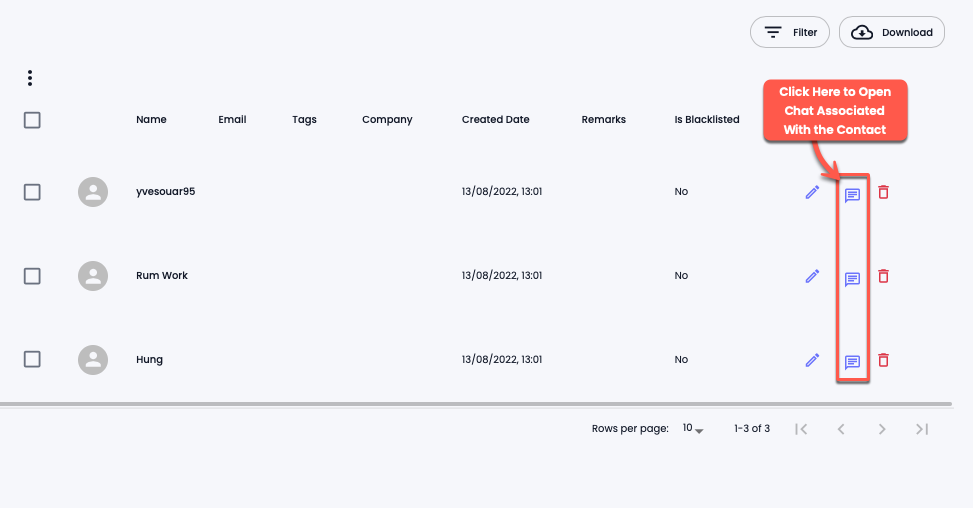
### Chat From Contacts
To access Chat directly from the Contacts module, click theChat Icon Button. It will open the chat with the associate contact.


 next to the delete button.

 associated with that group.
 associated with the particular filter rule.
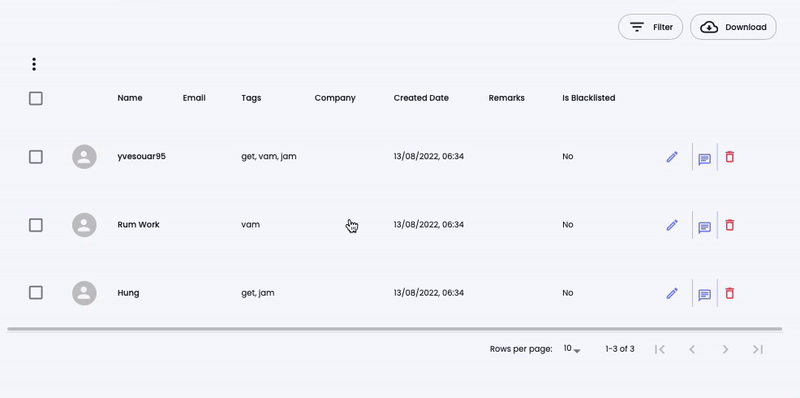
 then check/uncheck which column you want to view and which doesn't.
### Edit a Contact
then check/uncheck which column you want to view and which doesn't.
### Edit a Contact

 Chat Icon Button. It will open the chat with the associate contact.