> For the complete documentation index, see [llms.txt](https://docs.rampwin.com/llms.txt). Markdown versions of documentation pages are available by appending `.md` to page URLs; this page is available as [Markdown](https://docs.rampwin.com/english/button-options-product-messages.md).
# Button/Options/Product Messages
Using the Buttons/Options/Product Messages option in the WhatsApp channel, send pre-built interactive messages like Buttons, Lists, and Single or Multi Product messages.
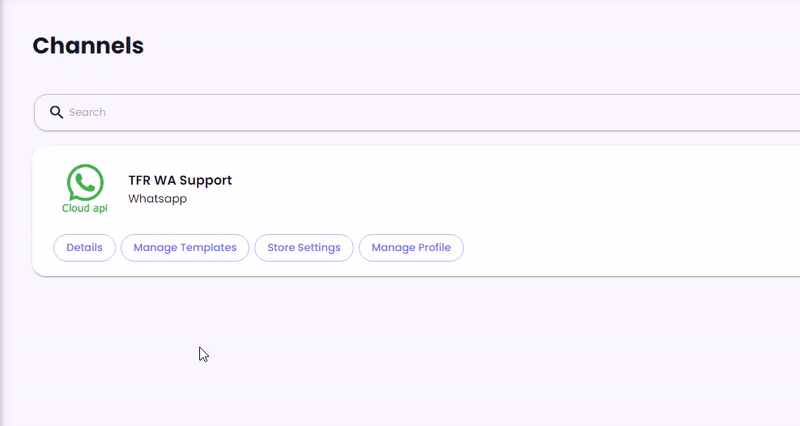
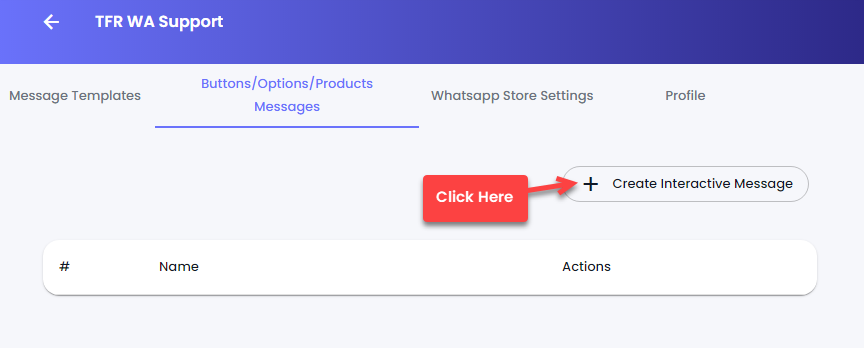
Click **Details** → then open **Buttons/Options/Product Messages**.
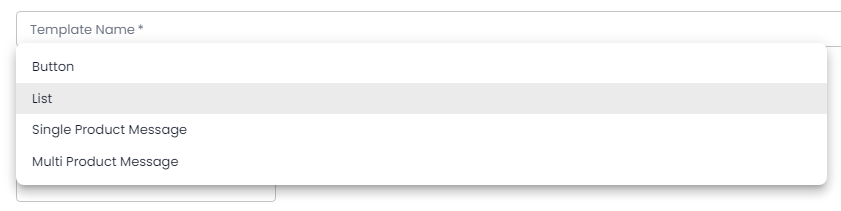
Then click **Create Interactive Message**. It will open the template builder, where you can define the template name and then select a Message Type,
There are 4 Message Types, and upon selecting each of them, you'd get different options.
* [Buttons](#button)
* List
* Single Product Message
* and Multi Product Message
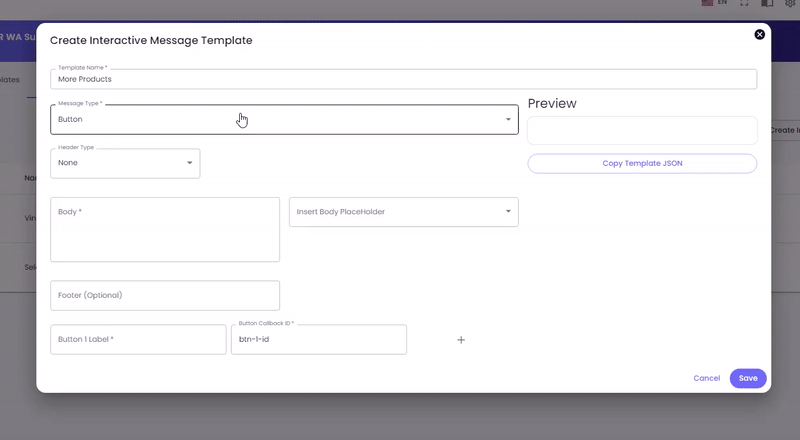
### Button
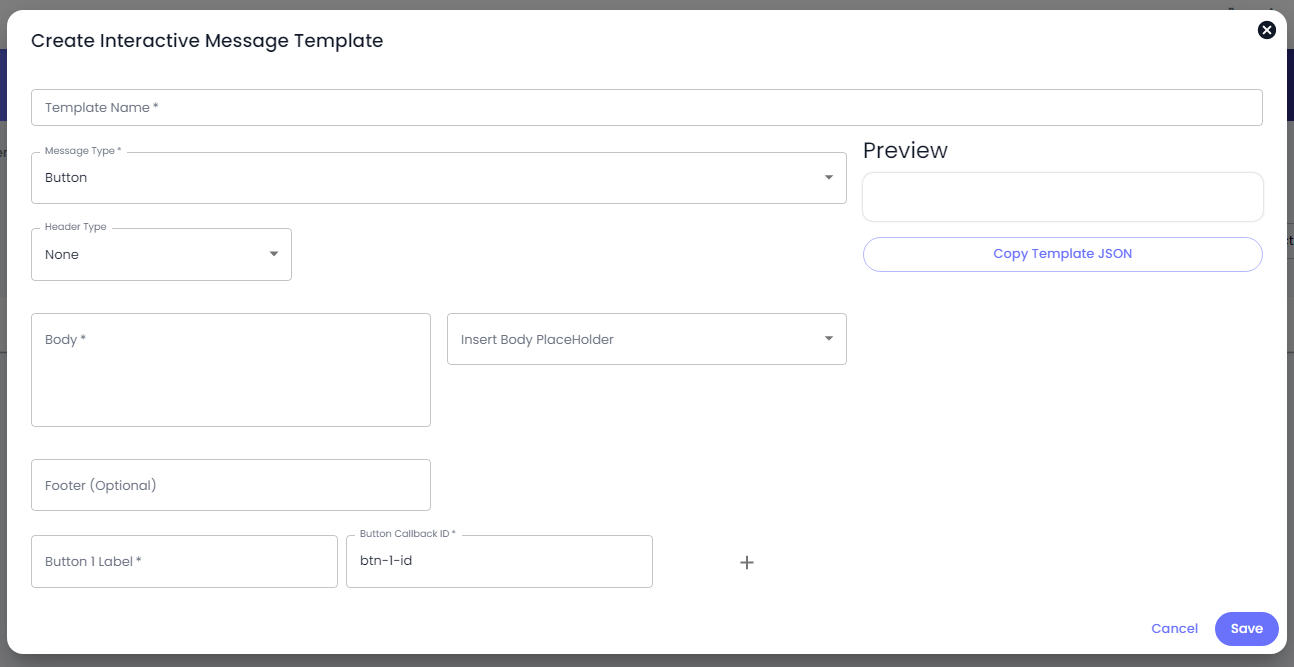
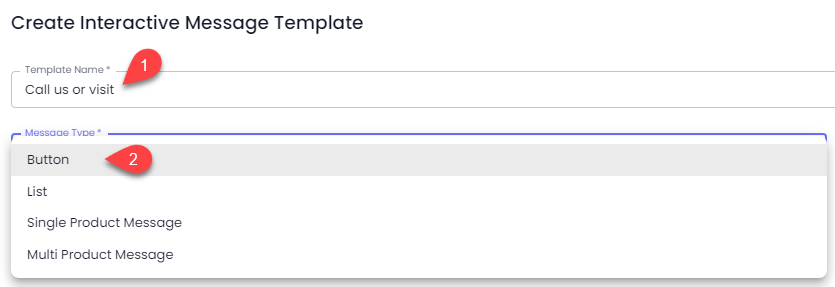
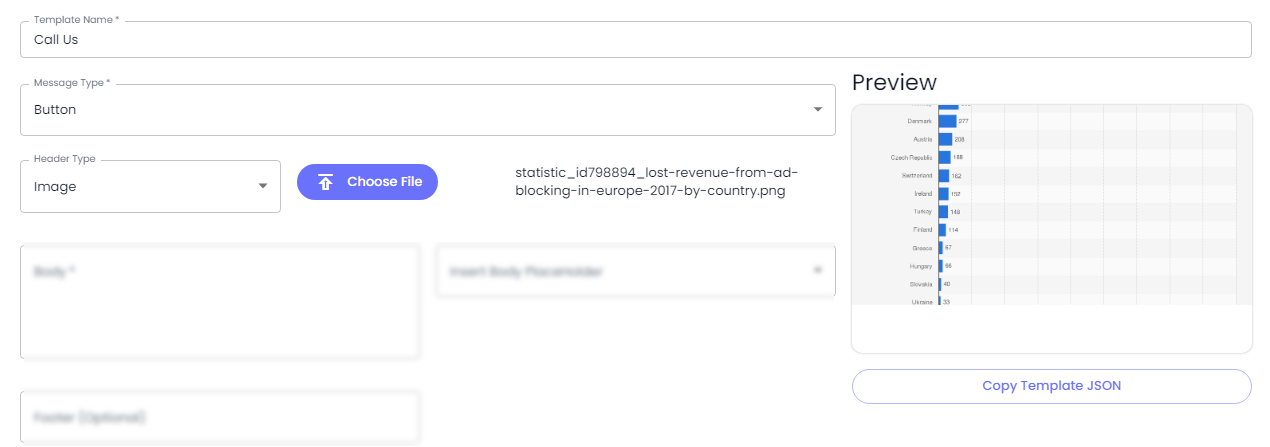
First, define the name of the template, then select message type as Button.
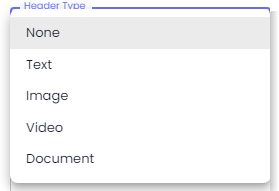
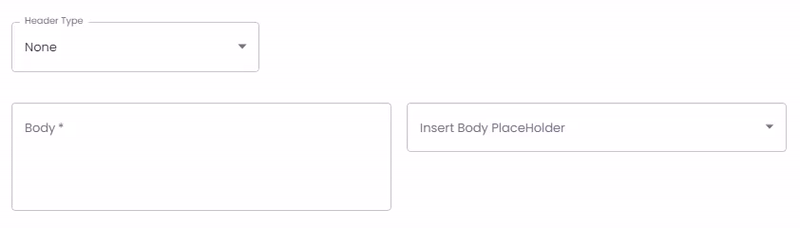
Then select your Header Type from the available options,
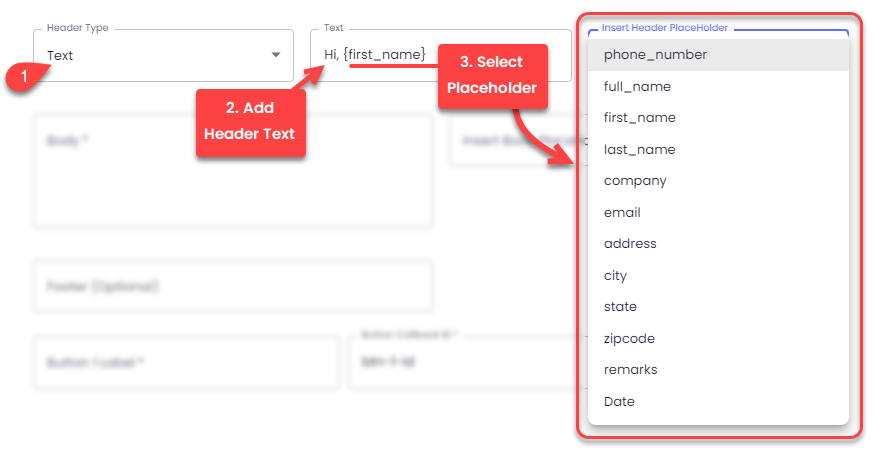
If you choose Text, add a placeholder for the template, which will get replaced with the correct information when you send the template.
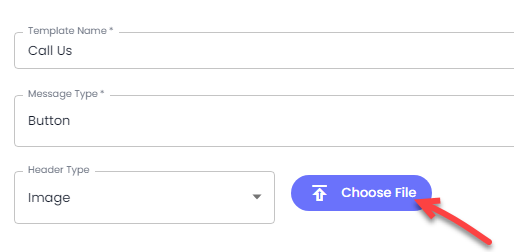
If you choose Header type as Image, Video, or Document, you need to upload a file. Click **Choose File** and select your file.
Once the file is uploaded, you can see it in the preview section.
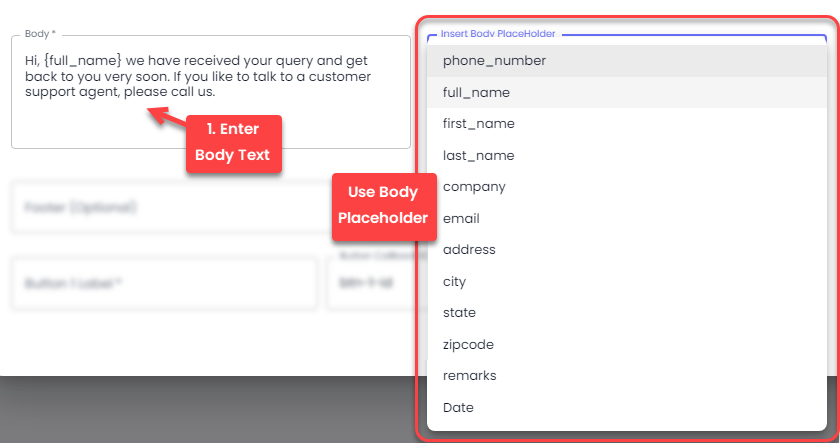
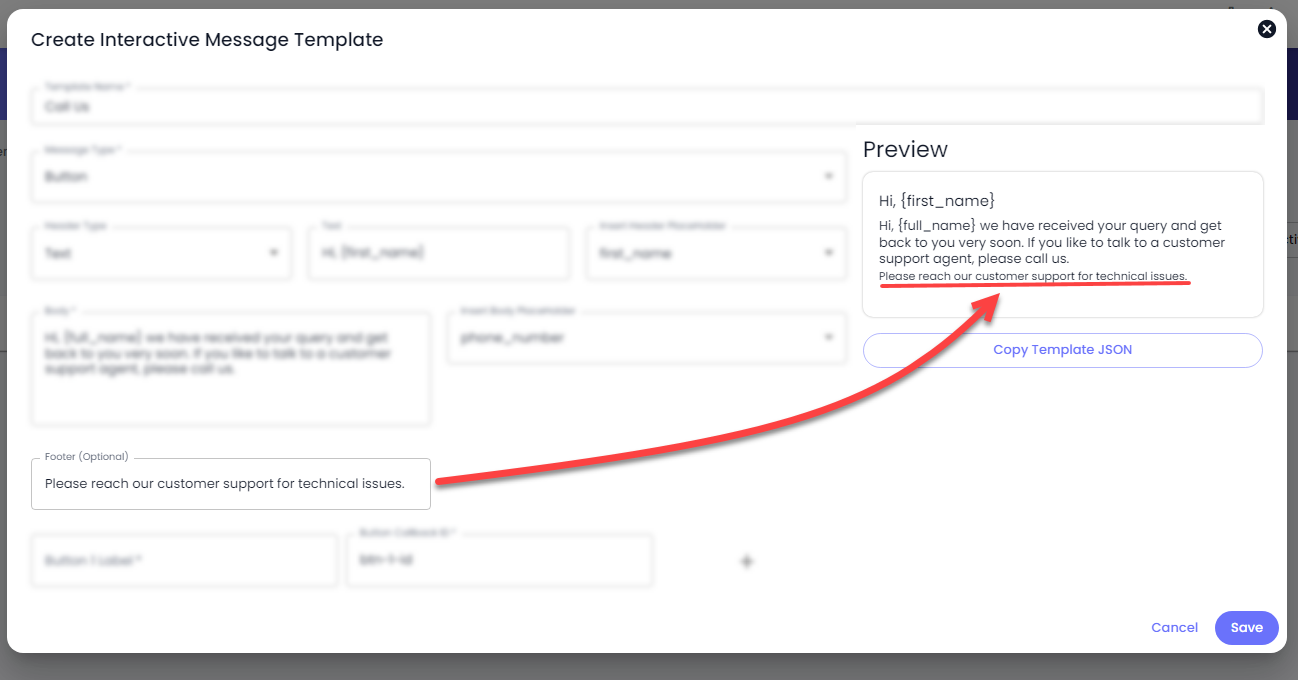
After setting the Text, or uploading a file representing the Header, enter the text for your Body with Placeholder.
If you'd like to add a Footer to the template, you can do that in the Footer field, which is optional.
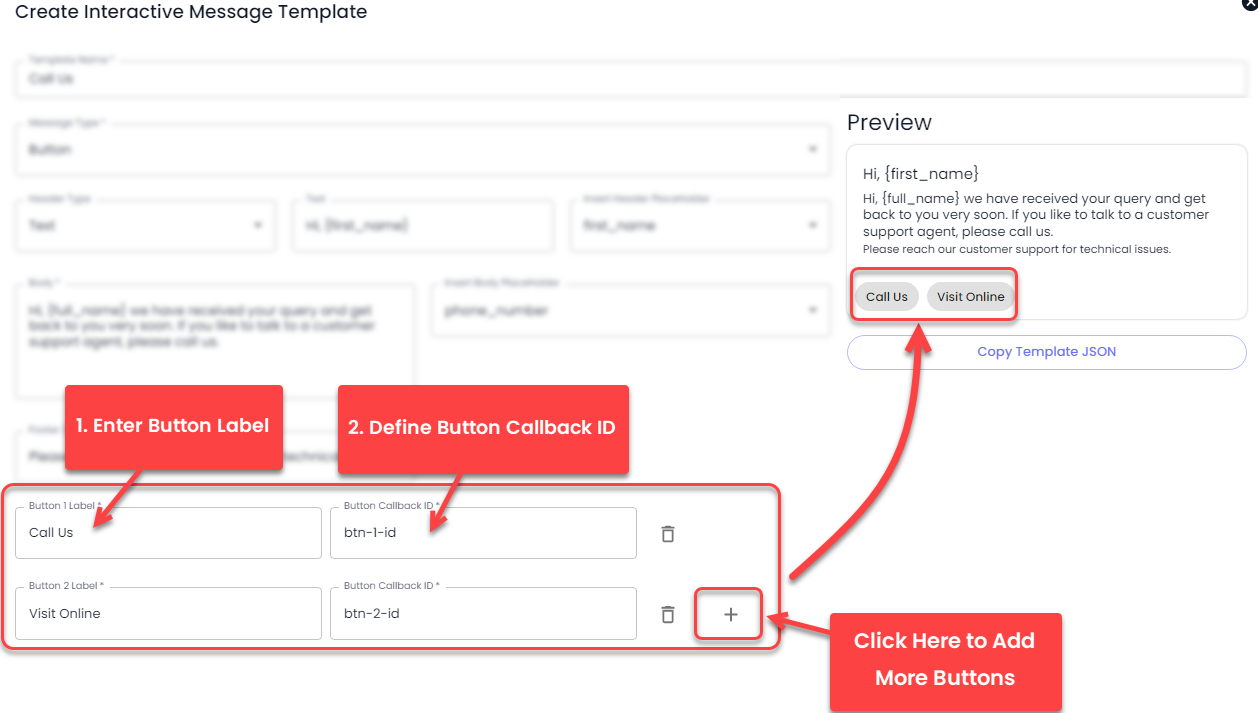
After the footer, you get the option to add buttons to your message template.
Simply enter the Button Label, then change Button Callback ID, if needed. You can add another button by clicking thePlus Icon button.
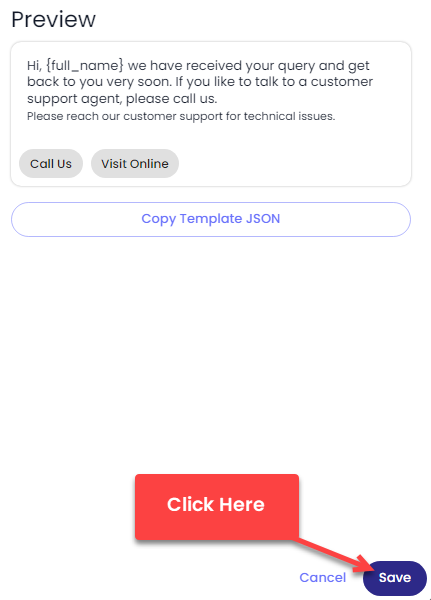
Once added the button and its detail, check the preview and if everything's correct, click **Save**. And that's it; you have created an interactive button message. Likewise, you can create other interactive messages.
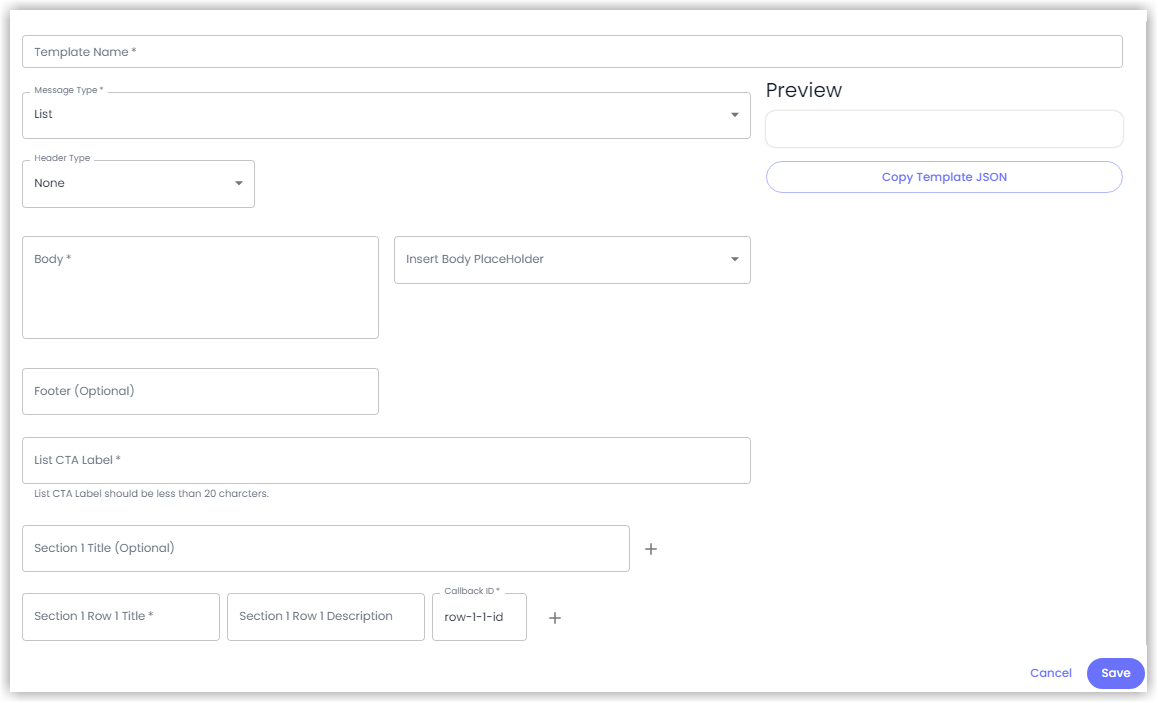
### List
Likewise the Button interactive message, you can also create a List message. Simply select List at the place of the Button.
This will provide you with the following options,
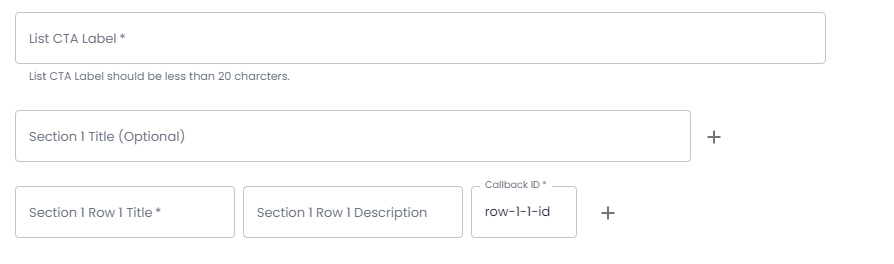
Similar to Button, you get common fields: Header, Body and Footer. What you get additionally is the List CTA Label, Section Title and Section Row.
First, enter the details in the Header, Body and Footer. Then, head over to the List options.
Once done, see the preview, and everything is correct; click Save.
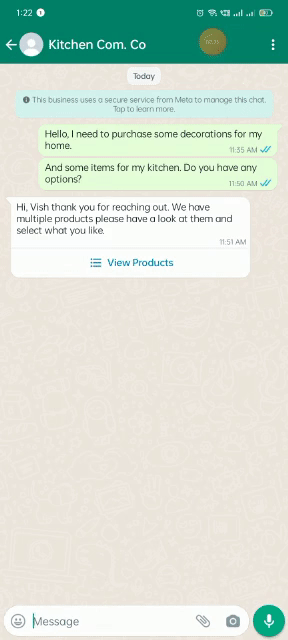
When you send the List Interactive Message, your contact(s) will see the message and interact with it like the above.
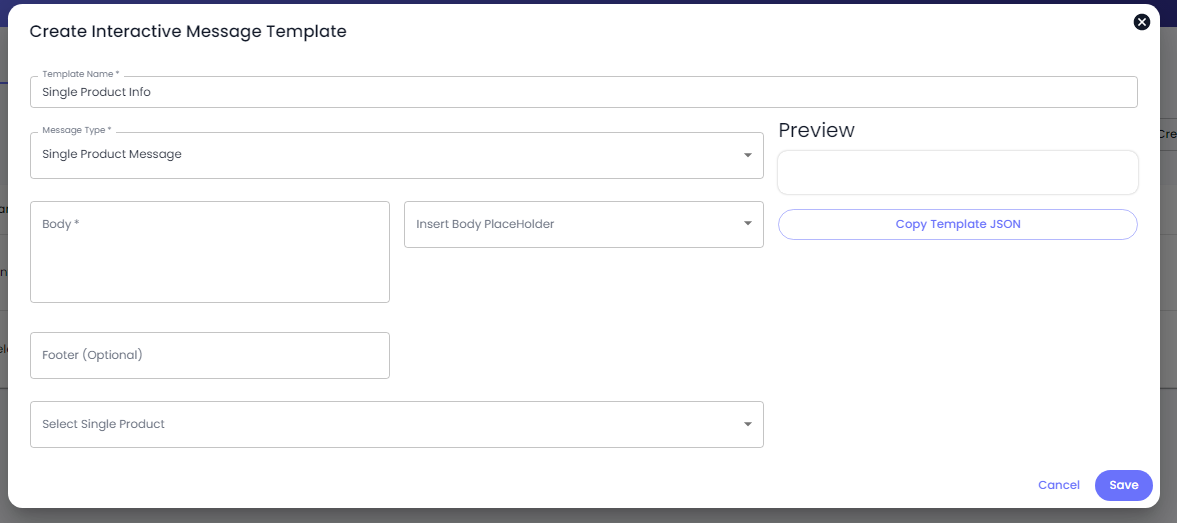
### Single Product Message
In addition to [List](#list) and [Button](#button), you can send Product Messages if you've set your Catalog. Refer to the following docs to learn how to set up a Product Catalog for WhatsApp Channel in Rampwin.
So, in place of List or Button, select **Single Product Message**. This will allow you to send an interactive message only with a single product.
Once selected, you get the following additional options,
Head to it and select the product you want to send with the message.
Once done, click Save.
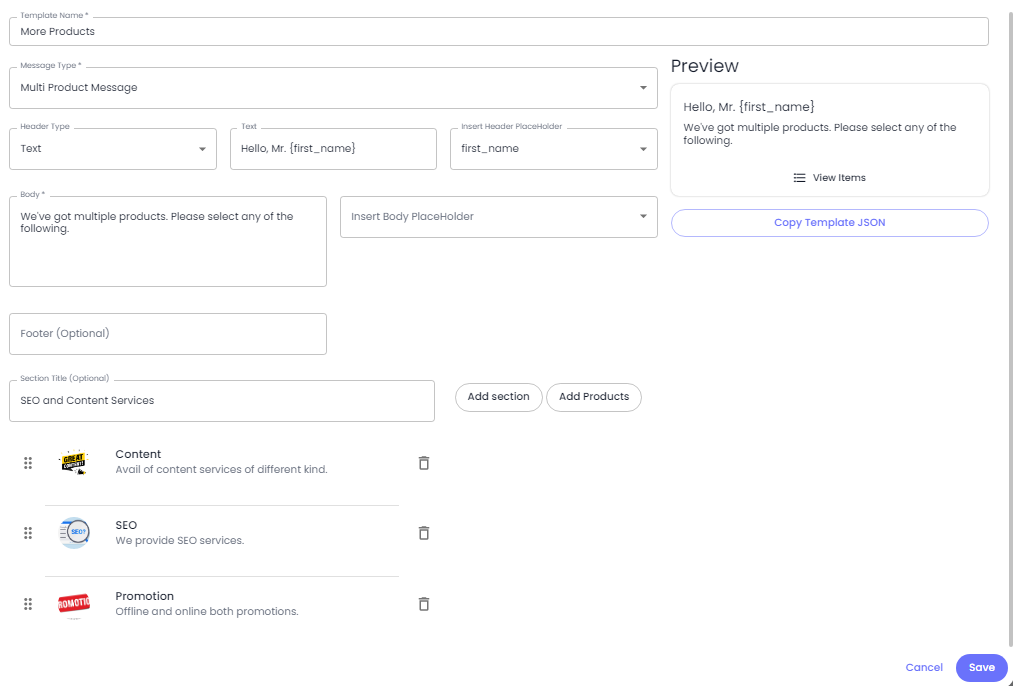
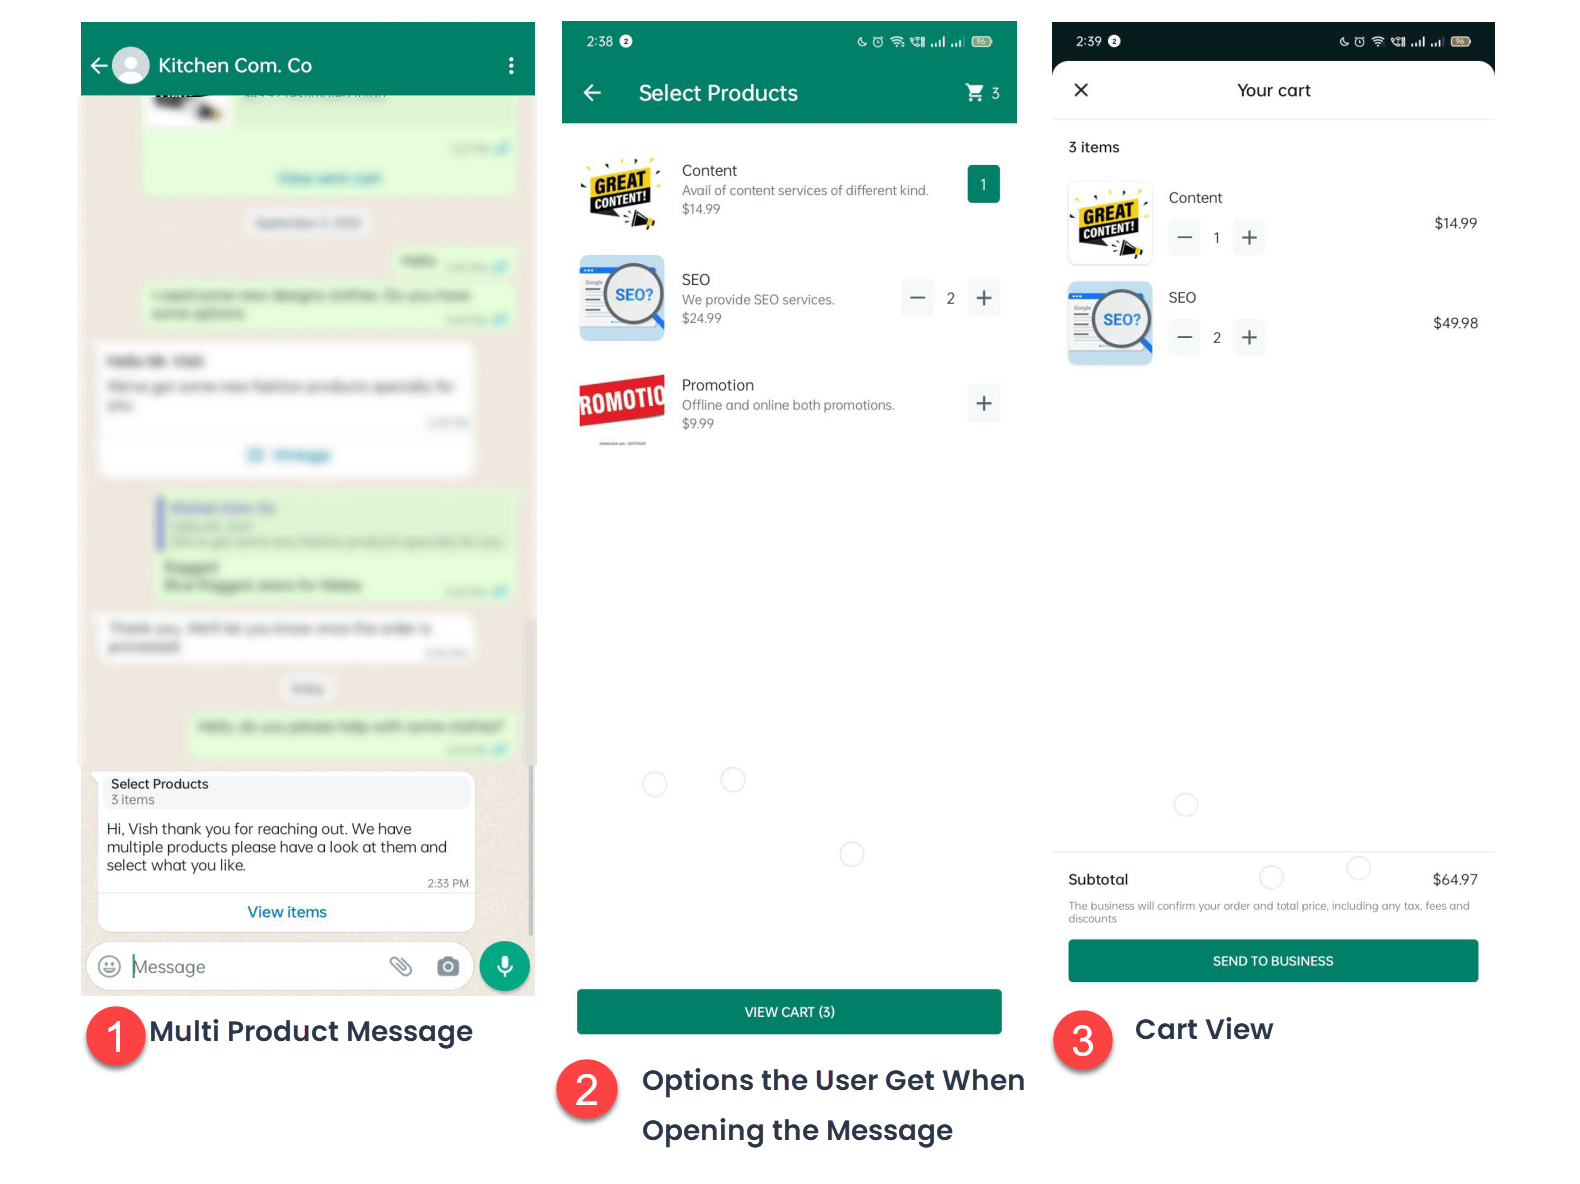
### Multi Product Message
Using the Multi Product Message, you can send an interactive message that will allow your customers, to select a product from multiple choices. To create a multi-product message, first, select **Multi Product Message**.
Then, enter the details for the Header, Body and Footer if you need to.
Once you're done with them, enter the section title and then click on **Add Products** to select products for the message.
After adding the products, you can add another section by clicking Add Section button. Otherwise, click **Save**.
When you'll send your contacts the multi product message, they interact with it like the above.
{% hint style="info" %}
Before creating Product Messages, ensure you've set up Product Catalog(s.)
{% endhint %}
### Using Buttons/Options/Product Message
Through [Chat Module](broken://pages/PF4UsEx3uzNlcvuJh8mR#send-buttons-options-product-messages), you can use an interactive message easily.
{% content-ref url="/pages/keSePf9uldDdwSPb40jV" %}
[Send Message](/english/send-message.md)
{% endcontent-ref %}
### Edit or Delete an Interactive Message
To edit and delete a particular interactive message template,
* Click on theEdit Icon button to edit it.
* Or click on theDelete Icon button to delete the template.

 Plus Icon button.


 Edit Icon button to edit it.
* Or click on the
Edit Icon button to edit it.
* Or click on the Delete Icon button to delete the template.